
TL;DR
- Elderberries are best harvested in late summer to early fall, typically from mid-August to mid-September
- Proper cleaning and removal of stems and leaves is crucial, as these parts can be toxic
- Freezing is the recommended method for long-term storage of whole elderberries
- Drying elderberries is an effective preservation method for long-term storage
- Whole elderberries should not be canned using a water bath method due to low acidity, but elderberry juice can be safely canned
Introduction
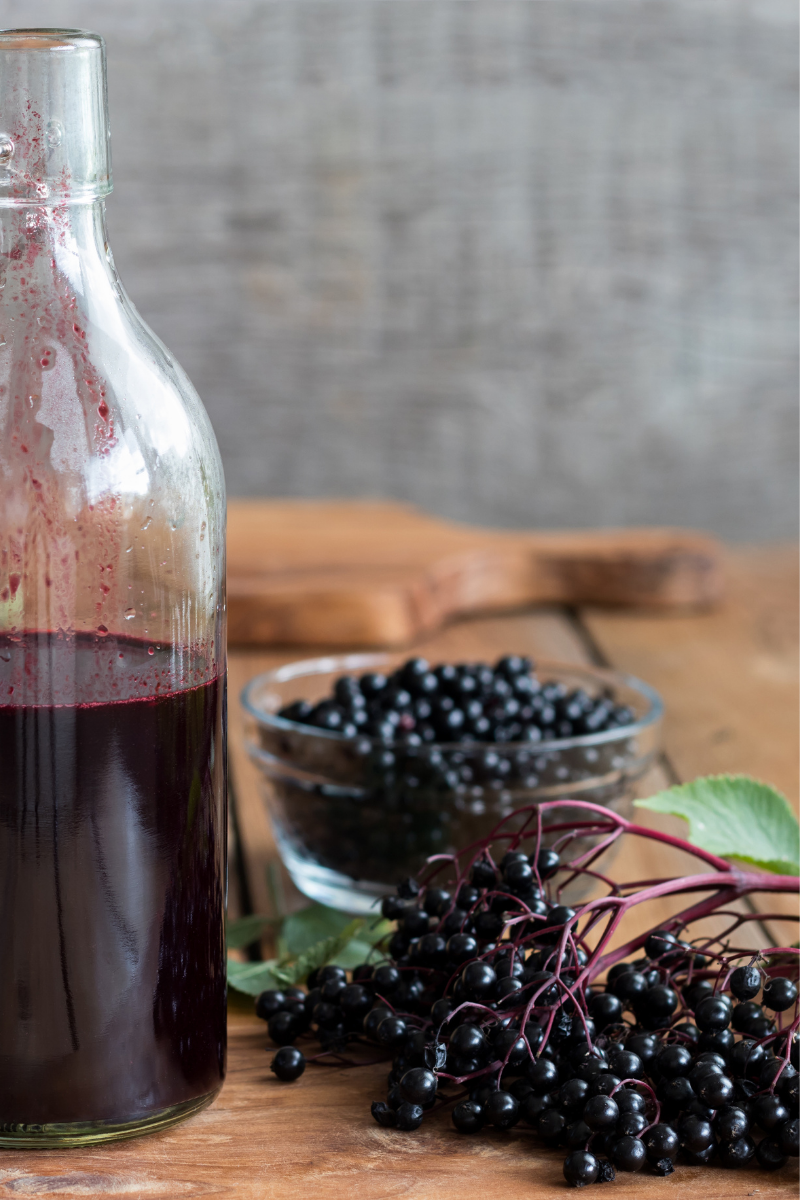
Elderberries – nature’s tiny purple powerhouses. These berries pack a punch of flavor and nutrition, boasting high levels of antioxidants and vitamin C. But their magic fades fast without proper storage. Whether you’re a foraging enthusiast or a farmers’ market devotee, mastering elderberry storage ensures you’ll enjoy their benefits long after harvest season ends.
From boosting immunity to adding depth to your favorite recipes, elderberries deserve a prime spot in your pantry. Let’s dive into the art of preserving these delicate gems, so you can savor their goodness year-round.
Harvesting Elderberries
Identifying Ripe Elderberries
Timing is everything when it comes to elderberry harvest. Look for deep purple-black clusters hanging heavy on the bush. Ripe berries should be plump and slightly soft to the touch. Avoid green or red berries – they’re not ready and can cause stomach upset.
Late summer to early fall is prime picking time, typically from mid-August to mid-September. The berries often ripen unevenly, so you might need to revisit your favorite spot a few times for the perfect harvest.
Harvesting Techniques
Grab your scissors and a sturdy basket – it’s time to forage. Snip entire clusters of ripe berries, leaving a bit of stem attached. This makes cleaning easier later.
Wear gloves to protect your hands from stains and bring along a long-sleeved shirt. Elderberry bushes can be prickly, and reaching for those high clusters might leave you scratched otherwise.
Preparing Elderberries for Storage
Cleaning and Sorting
First things first: give those berries a bath. Gently swish the clusters in cool water to remove dirt and unwanted hitchhikers. Next, it’s time for quality control.
Spread the berries on a clean towel and inspect closely. Toss any that are shriveled, moldy, or still green. Remove leaves and large stem pieces – they’re bitter and can be mildly toxic. It’s important to note that elderberry plant stems and other parts can be toxic when consumed raw or uncooked, but cooking can reduce their toxicity.
Handling Fresh Elderberries
Treat your elderberries like the delicate treasures they are. Use a light touch when transferring them between containers. Avoid washing until you’re ready to use them – excess moisture is the enemy of freshness.
If you’re not planning to process them immediately, spread the berries in a single layer on a baking sheet. This prevents crushing and allows air circulation, keeping them fresher longer.
Short-Term Storage Methods
Refrigerating Fresh Elderberries
For short-term storage, the fridge is your friend. Line an airtight container with paper towels to absorb excess moisture. Gently pour in your cleaned berries, leaving some breathing room at the top.
Stored this way, fresh elderberries will last about a week. Check them daily and remove any that start to soften or show signs of mold. Use these refrigerated berries in smoothies, baked goods, or as a vibrant garnish for desserts.
Freezing Elderberries
Freezing Whole Clusters
Sometimes, the simplest method is best. For whole cluster freezing, arrange your cleaned berry bunches on a baking sheet. Pop it in the freezer until the berries are solid – usually a few hours.
Once frozen, transfer the clusters to freezer bags. Squeeze out as much air as possible before sealing. Label with the date, and you’ve got elderberries ready for winter pies and syrups.
Freezing Destemmed Berries
Individual frozen berries offer more flexibility in the kitchen. After cleaning, gently roll the berries off the stems. Spread them in a single layer on a baking sheet and freeze until solid.
Transfer the frozen berries to freezer bags or containers. Give the bag a gentle shake every few hours during the first day of freezing. This prevents the berries from clumping together, allowing you to portion out just what you need later.
Long-Term Storage Methods
Drying Elderberries
Air Drying
Channel your inner herbalist with this traditional method. Thread cleaned elderberry clusters onto a string, leaving space between each for air circulation. Hang these “elderberry necklaces” in a warm, dry spot away from direct sunlight.
Depending on humidity levels, air-drying can take 10-14 days. The berries are ready when they look like tiny raisins and feel leathery to the touch. Store your dried elderberries in airtight jars in a cool, dark place.
Oven Drying
No patience for air drying? Your oven can speed things up. Spread destemmed berries on a baking sheet lined with parchment paper. Set your oven to its lowest temperature – ideally around 115°F (46°C).
Prop the oven door open slightly to allow moisture to escape. Stir the berries every few hours for even drying. This method usually takes 6-8 hours. Let the dried berries cool completely before storing in airtight containers.
Using a Food Dehydrator
For the most consistent results, a food dehydrator is hard to beat. Arrange cleaned, destemmed berries in a single layer on the dehydrator trays. Set the temperature to 135°F (57°C) and let the machine work its magic.
Drying time varies, but expect it to take 8-10 hours. Rotate the trays occasionally for even drying. The berries are done when they’re dark and leathery, with no moisture when squeezed.
Canning Elderberries
It’s important to note that whole elderberries should not be canned using a water bath method. Instead, freezing is recommended as a safe alternative for preserving elderberries. This is because elderberries are generally too low in acid for safe home-canning.
Canning Elderberry Juice
While whole elderberries aren’t suitable for canning, elderberry juice can be safely preserved. Simmer cleaned berries with a splash of water until they burst. Strain through a jelly bag or cheesecloth – don’t squeeze, or you’ll cloud the juice.
Heat the strained juice to boiling. Pour into hot, sterilized jars leaving ¼ inch headspace. Process in a water bath canner for 10 minutes (adjust for altitude). Dilute the canned juice before drinking or use it as a base for syrups and jellies.
Safety Considerations
Canning is all about food safety. Always use tested recipes and follow proper canning procedures. Ensure your jars and lids are sterilized and free from cracks or chips.
After processing, check that all jars have sealed properly. Any jars that haven’t sealed should be refrigerated and used within a week. Store sealed jars in a cool, dark place and use within a year for best quality.
Best Practices for Storage
Regardless of your chosen method, some universal storage tips apply. Keep your elderberries away from direct sunlight and heat sources. Consistent, cool temperatures are key to preserving flavor and nutritional value.
For dried or frozen berries, moisture is the enemy. Use airtight containers and consider adding a food-safe desiccant packet to dried berries for extra protection. Check your stored elderberries periodically, discarding any that show signs of mold or off-odors.
Troubleshooting Common Issues
Even with the best care, storage hiccups can happen. If your dried berries become tough, try rehydrating them in warm water before use. Frozen berries that have developed freezer burn are still safe to eat – use them in cooked applications where texture is less important.
For canned elderberry juice, always check for signs of spoilage before consuming. Bulging lids, off-colors, or strange odors are red flags. When in doubt, throw it out – food safety should always come first.
Conclusion
From fresh-picked clusters to neatly frozen bags, you’re now equipped to keep elderberries at their best. These versatile berries are more than just a seasonal treat – with proper storage, they’re a year-round secret weapon in your culinary arsenal.
So go ahead, stock up on elderberries and get creative. Your future self will thank you when you’re sipping homemade elderberry syrup in the depths of winter or adding a burst of flavor to spring desserts. Happy storing!


Leave a Reply