
TL;DR
- Proper storage of lemon zest extends shelf life and reduces food waste
- Refrigerated zest lasts up to a week, frozen zest up to six months
- Drying lemon zest concentrates flavor and allows for long-term storage
- Different storage methods suit various culinary applications
- Stored zest can be substituted for fresh in recipes with proper adjustments
Introduction
The bright, citrusy aroma of lemon zest can transport you to sun-drenched groves in an instant. This culinary powerhouse packs a flavor punch that can elevate dishes from ordinary to extraordinary. But what happens when you’ve zested a lemon and only need a pinch? Don’t let that golden goodness go to waste! Proper storage of lemon zest not only reduces food waste but also ensures you always have this secret weapon at your fingertips. Ready to become a zest master? Let’s dive in!
Benefits of Storing Lemon Zest
Storing lemon zest is like keeping a little bit of sunshine in your kitchen. Here’s why it’s worth the effort:
Extended shelf life: Properly stored zest can last for weeks or even months, far outliving fresh lemons.
Convenience at your fingertips: No more last-minute trips to the store when a recipe calls for a dash of zest.
Versatility in cooking: From sweet to savory, lemon zest adds depth to countless dishes. Having it on hand opens up a world of culinary possibilities.
Cost-effective: Use every part of the lemon, reducing waste and stretching your grocery budget.
Flavor boost: A sprinkle of zest can brighten up even the simplest meals, turning everyday dishes into something special.
Tools for Zesting
The right tool can make zesting a breeze. Here are your options:
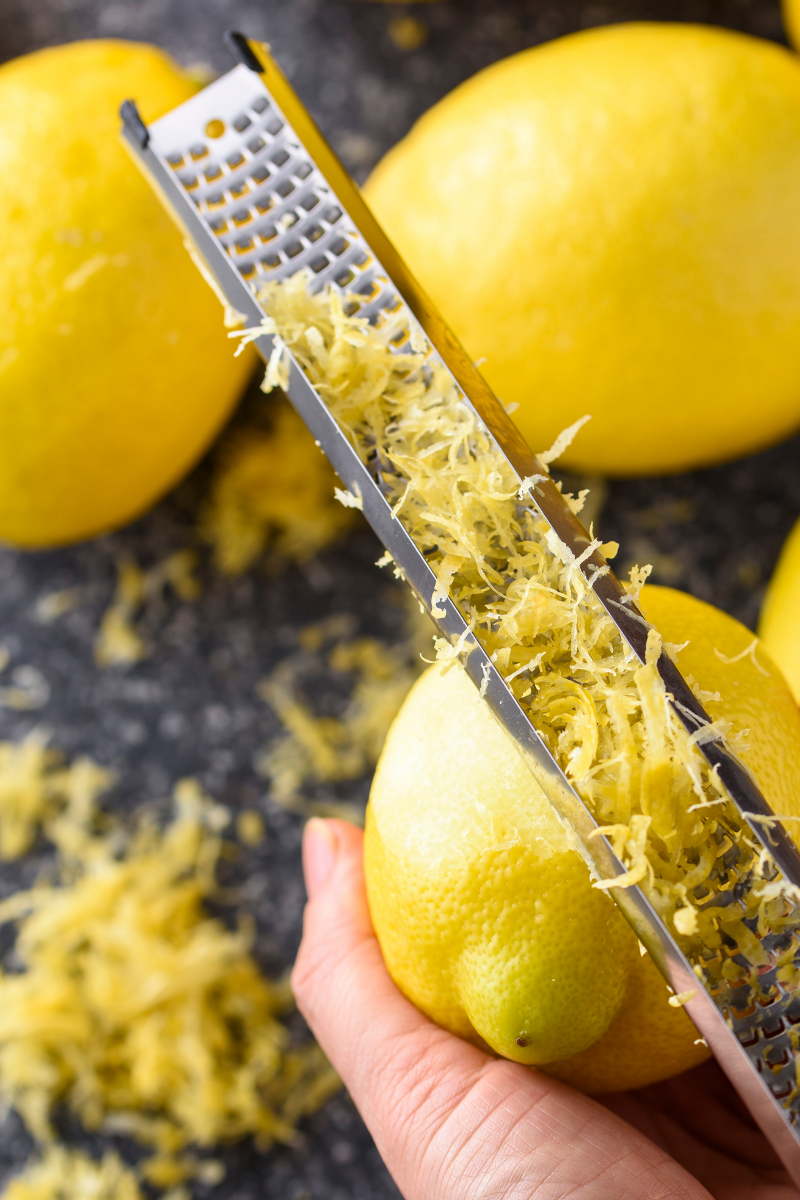
Microplane: This long, narrow grater produces fine, fluffy zest. It’s precise and easy to use, but can be tricky to clean.
Zester: A handheld tool with small holes at one end. It creates long, thin strips of zest. Perfect for garnishes, but slower for large quantities.
Box grater: The small holes on a standard grater work in a pinch. It’s versatile but can be awkward for small lemons.
Vegetable peeler: Creates wide strips of zest. Ideal for cocktails or dishes where you’ll remove the zest before serving. Requires extra care to avoid the bitter pith.
Zesting Techniques
Mastering the art of zesting is key to getting the most flavor with the least effort:
Wash and dry the lemon thoroughly.
Hold your zesting tool at a 45-degree angle to the lemon’s surface.
Apply gentle pressure and move the tool across the lemon in short strokes.
Rotate the lemon as you go, zesting only the yellow outer layer.
Stop when you see the white pith – it’s bitter and will ruin your zest’s flavor.
Pro tip: Zest your lemons before juicing them. It’s much easier to zest a whole lemon than a squeezed half!
Storage Methods
Refrigeration
The fridge is your friend when it comes to short-term zest storage. Here’s how to do it right:
Pat your freshly grated zest dry with a paper towel.
Transfer it to an airtight container or resealable plastic bag.
Press out as much air as possible before sealing.
Label with the date and pop it in the fridge.
Properly stored, refrigerated zest will stay fresh for up to a week. For an extra flavor boost, mix the zest with a bit of salt or sugar before storing – this helps preserve it and creates an instant flavoring for your dishes.
Bonus tip: If you’ve juiced your lemons, store the juice in a separate container alongside your zest. They’ll be ready and waiting for your next culinary creation!
Freezing Fresh Zest
For longer-term storage, freezing is the way to go. Follow these steps:
Spread freshly grated zest in a thin layer on a parchment-lined baking sheet.
Freeze for about an hour, or until the zest is frozen solid.
Transfer the frozen zest to a freezer-safe container or bag.
Remove as much air as possible and seal tightly.
Label with the date and return to the freezer.
Frozen zest will keep its flavor for up to six months. The best part? You can use it straight from the freezer – no need to thaw!
Freezing in Ice Cube Trays
Want perfectly portioned zest at your fingertips? Try the ice cube tray method:
Fill each compartment of an ice cube tray about 2/3 full with lemon zest.
Top off with water or olive oil, depending on your intended use.
Freeze until solid, then pop out the cubes and transfer to a freezer bag.
Label and date the bag before returning it to the freezer.
These zesty cubes are perfect for dropping into soups, sauces, or even cocktails. For a double whammy of lemon flavor, freeze lemon juice in separate trays using the same method.
Drying
Dried lemon zest is a powerhouse of concentrated flavor. Here are two methods to try:
Air-drying:
- Spread zest in a thin layer on a paper towel-lined plate.
- Leave in a warm, dry place for 2-3 days, stirring occasionally.
- Store in an airtight container once completely dry.
Dehydrator method:
- Arrange zest in a single layer on dehydrator trays.
- Set the temperature to 95°F (35°C).
- Dry for 8-12 hours, or until the zest is crisp and crumbly.
- Cool completely before storing in an airtight container.
Dried zest can last for months when stored properly. Crush it into a powder for an intense burst of lemon flavor in your recipes.
Using Stored Lemon Zest
Cooking with Stored Zest
Each storage method lends itself to different culinary applications:
Refrigerated zest: Perfect for fresh, no-cook applications. Sprinkle it over salads, mix into yogurt, or use as a garnish for cocktails.
Frozen zest: Ideal for cooked dishes. Toss it into pasta sauces, stir into cake batters, or mix into marinades for an instant flavor boost.
Dried zest: A powerhouse in spice blends and rubs. Mix it with salt for a zesty seasoning, or grind it with dried herbs for a custom spice mix.
Experiment with different forms in your favorite recipes. You might discover a new favorite way to use this versatile ingredient!
Substituting Zest Forms
Different forms of zest can be swapped in recipes with a little know-how:
- 1 teaspoon fresh zest = 1/2 teaspoon dried zest
- 1 frozen zest cube = about 1 tablespoon fresh zest
Remember, dried and frozen zest have more concentrated flavor than fresh. Start with less than the recipe calls for and adjust to taste.
For best results, add dried zest early in the cooking process to allow it to rehydrate and release its flavors. Frozen and fresh zest can be added towards the end of cooking for a brighter flavor.
Conclusion
From fridge to freezer to dehydrator, you’re now equipped with all the tools to make the most of every lemon that crosses your cutting board. No more wasted zest, no more missed opportunities for flavor. Your culinary creations are about to get a whole lot zestier. So grab those lemons and start zesting – your taste buds will thank you for it!


Leave a Reply