
TL;DR
- Winter squash can be stored for up to 6 months under proper conditions (50-55°F, 50-70% humidity)
- Summer squash has a shorter shelf life but can be frozen for up to 12 months
- Curing is crucial for most winter squash varieties, but not for acorn squash
- Different squash varieties have varying storage times: acorn (2-4 months), butternut (2-4 months), Hubbard (3-6 months)
- Proper drying can preserve squash for up to 6 months at room temperature
Introduction
Picture this: you’ve just harvested a bumper crop of squash from your garden, or perhaps you couldn’t resist that farmers market deal. Now what? Proper squash storage is the unsung hero of the kitchen, allowing you to savor summer’s bounty well into winter or preserve winter varieties for months on end. Beyond mere convenience, mastering squash storage techniques helps reduce food waste and saves money. Plus, with squash being a nutritional powerhouse—packed with vitamins, minerals, and fiber—learning to store it effectively means you’re always just a few steps away from a healthy meal.
Types of Squash
Summer Squash
Zucchini, yellow squash, pattypan—these tender-skinned varieties are the sprinters of the squash world. They grow quickly, have a high water content, and a relatively short shelf life. Their delicate nature means they bruise easily and don’t take well to long-term storage. But fear not! With the right techniques, you can keep summer squash fresh for 1-2 weeks or preserve them for future use.
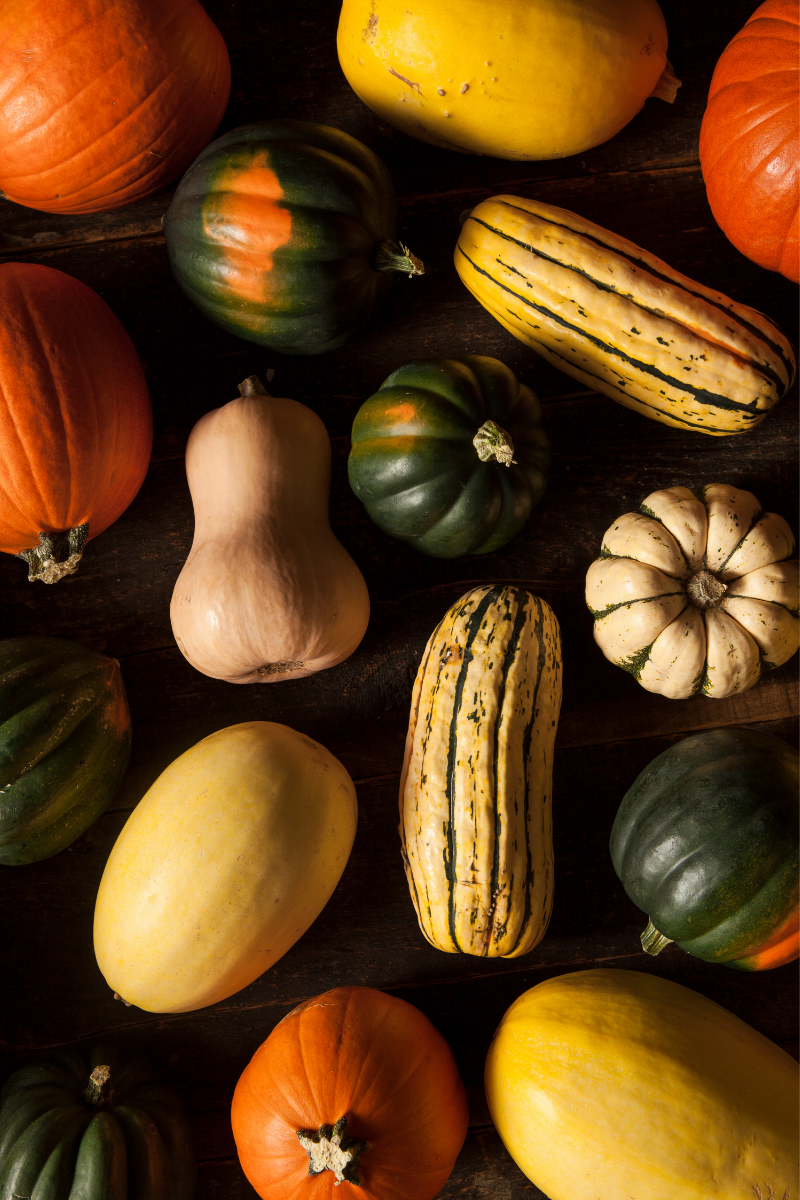
Winter Squash
Butternut, acorn, pumpkin—these thick-skinned champions are the marathoners of the squash family. They’re harvested late in the season and, when properly stored, can last for months. Their hard rinds and lower moisture content make them ideal candidates for long-term storage. With the right conditions, some winter squash varieties can keep for up to 6 months, providing a steady supply of comfort food through the coldest months.
Harvesting and Preparing Squash
Picking the Right Time
Timing is everything when it comes to harvesting squash for storage. For summer varieties, don’t wait too long—pick them when they’re young and tender, about 6-8 inches long for zucchini. The skin should be glossy and easily pierced with a fingernail.
Winter squash, on the other hand, need time to mature fully on the vine. Wait until the stems begin to dry and crack, and the skin has hardened enough to resist a fingernail. A good thump should produce a hollow sound. Harvest before the first frost for best storage results.
Cleaning and Curing
After harvesting, give your squash a gentle bath. For summer squash, a quick rinse and pat dry will do. Winter squash benefit from a more thorough cleaning with a mild soap solution to remove dirt and potential pathogens.
Curing is crucial for most winter squash. It allows the skin to harden further and heal any small nicks, significantly extending storage life. To cure, place winter squash in a warm 80-85°F (27-29°C) area with 75-85% relative humidity and good air circulation for about 10 days. After curing, they’re ready for long-term storage. However, it’s important to note that acorn squash should not be cured, as it reduces their quality and storage life.
Fresh Storage Methods
Storing Summer Squash
Summer squash are best stored in the refrigerator. Place them unwashed in a perforated plastic bag or wrap in a damp paper towel. The ideal temperature is around 50°F with 95% humidity. Under these conditions, they’ll last 5-7 days.
Don’t wash summer squash until you’re ready to use them, as excess moisture can lead to mold. If you notice any soft spots, use those squash first. Remember: with summer squash, fresher is always better.
Storing Winter Squash
Winter squash thrive in cool, dry conditions. The ideal temperature range is 50-55°F (10-13°C) with about 50-70% humidity. A basement or cool closet often works well. Arrange them in a single layer, not touching each other, to allow for air circulation.
Different varieties have different storage lives:
Check your stored squash regularly and remove any that show signs of decay to prevent it from spreading.
Vacuum Packaging
Vacuum packaging can extend the fresh storage life of both summer and winter squash. This method removes air, slowing down the deterioration process. For summer squash, vacuum seal and refrigerate for up to 2 weeks. Winter squash can be vacuum sealed and stored in a cool, dark place for up to 2 months longer than their usual storage time.
When vacuum sealing summer squash, consider blanching them first to preserve color and texture. For winter squash, make sure they’re fully cured before sealing to prevent moisture buildup inside the package.
Freezing Squash
Freezing Summer Squash
Freezing is an excellent way to preserve summer squash for up to 12 months for best quality. Here’s a step-by-step guide:
- Wash and trim the ends.
- Cut into 1/4-inch slices.
- Blanch for 3 minutes in boiling water.
- Plunge into ice water to stop the cooking process.
- Drain and pat dry.
- Spread on a baking sheet and freeze until solid.
- Transfer to freezer bags, removing as much air as possible.
Blanching is crucial as it deactivates enzymes that would otherwise lead to loss of flavor, color, and texture.
Freezing Winter Squash
Winter squash can last up to 12 months in the freezer. Here’s how:
- Cut the squash in half and remove seeds.
- Bake at 350°F until tender, about 45 minutes to an hour.
- Scoop out the flesh and mash or puree.
- Cool completely.
- Pack into freezer containers, leaving 1/2 inch headspace.
- Label, date, and freeze.
You can also freeze winter squash raw in cubes, but the texture may be slightly softer when thawed.
Canning Squash
Canning is a great option for long-term storage, but it’s crucial to follow safe canning practices to avoid the risk of botulism. Only use tested recipes from reliable sources.
For summer squash, the USDA recommends freezing instead of canning due to its low acidity. If you must can summer squash, use a pressure canner and add acid like lemon juice or vinegar.
Winter squash can be safely canned in a pressure canner. Here’s a basic process:
- Peel and cut squash into 1-inch cubes.
- Boil for 2 minutes.
- Pack hot into jars, leaving 1-inch headspace.
- Add boiling water, maintaining 1-inch headspace.
- Process in a pressure canner at 10 pounds pressure (adjusting for altitude).
Always inspect your canned goods before use. If you notice any signs of spoilage—bulging lids, off-odors, or mold—discard the contents immediately.
Pickling Squash
Pickling is a delicious way to preserve summer squash. For a quick refrigerator pickle:
- Slice squash thinly.
- Pack into jars with herbs and spices (dill, garlic, and peppercorns work well).
- Bring equal parts vinegar and water to a boil with salt and sugar.
- Pour hot brine over squash.
- Cool and refrigerate for at least 24 hours before eating.
These will keep in the refrigerator for about 2 months.
For longer storage, process pickled squash in a water bath canner. This method can preserve your pickles for up to a year. Always use a tested recipe to ensure safe acidity levels.
Drying Squash
Drying squash concentrates its flavor and creates a versatile ingredient for soups, stews, and snacks. Here’s how:
- Wash and slice squash 1/4 inch thick.
- Blanch for 3 minutes, then ice bath.
- Arrange on dehydrator trays or baking sheets.
- Dry at 140°F in a dehydrator or lowest oven setting until leathery to brittle (6-12 hours for summer squash, 10-16 hours for winter squash in a dehydrator, and potentially twice as long in a conventional oven).
- Cool completely before storing in airtight containers.
Properly dried squash can last up to 6 months at room temperature. Rehydrate by soaking in hot water for 30 minutes before using in recipes.
Maintaining and Using Stored Squash
Signs of Spoilage
Regular checks are key to maintaining your squash stash. Look out for:
- Soft spots or bruising
- Mold growth
- Off-odors
- Oozing or weeping
- Significant color changes
For winter squash, a little surface mold can sometimes be cut away, but if the flesh beneath is affected, it’s best to compost the whole squash.
Thawing and Cooking Tips
To thaw frozen squash, transfer it to the refrigerator overnight. For faster thawing, place the sealed package in cold water.
Frozen summer squash is best used in cooked dishes like soups, stews, or casseroles. Its texture may be too soft for raw applications.
Thawed winter squash puree works wonderfully in pies, breads, and soups. Cubed winter squash can go straight from freezer to roasting pan—just increase cooking time slightly.
Don’t let your stored squash intimidate you. Get creative! Shred summer squash into fritters, stuff winter squash with grains and cheese, or blend smooth for a velvety soup. Your well-stored squash is a blank canvas for culinary adventures.
Conclusion
Mastering squash storage is like having a secret weapon in your culinary arsenal. With these techniques at your fingertips, you’re ready to make the most of every squash that comes your way. Experiment with different methods to find what works best for your lifestyle and space. Remember, good storage isn’t just about preserving food—it’s about preserving possibilities. So go ahead, stock up on squash, and let your imagination run wild in the kitchen.


Leave a Reply